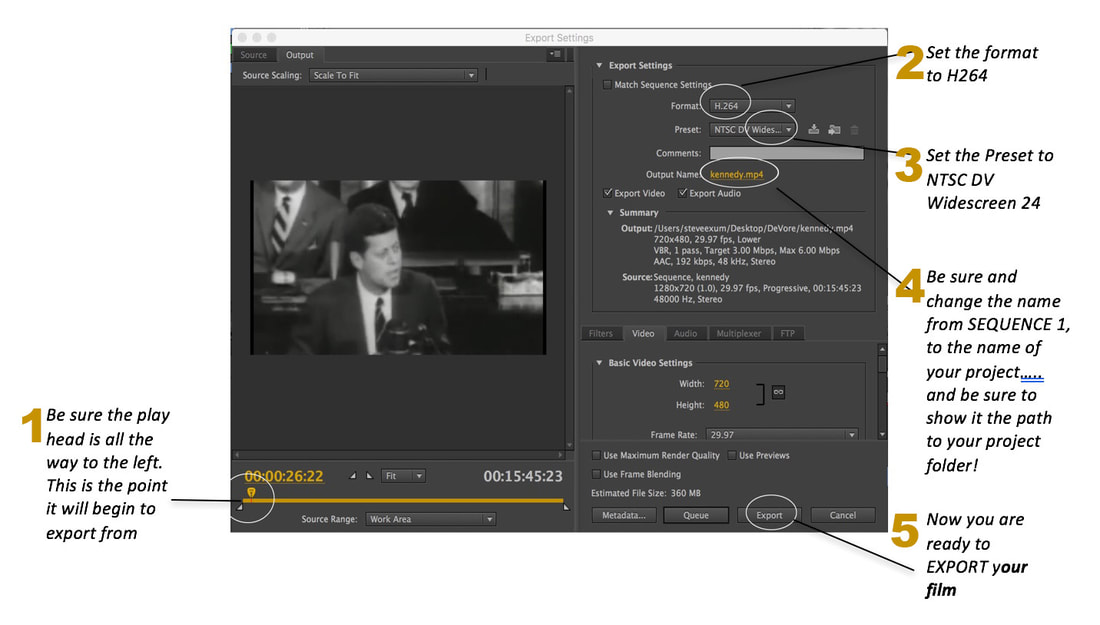
Exporting with Premiere Pro
First, Choose FILE > EXPORT> MEDIA and you will get this pop up menu
What Is Compression?
When you encode a video, you're compressing it so it takes up less disk space. There are tons of different codecs that let you do this and many different file formats. For example, H.264 is a codec and MOV is a file format. H.264 can encode your video, but you've probably seen it delivered as an MOV, AVI, or MP4 file. That's because all these formats can serve as a content container for H.264 video. There's no real significant difference between H.264 files with these various file types, so don't worry too much about how to deliver. My preference is MP4, because pretty much everything can play it, but most video software can handle the other formats too.
Bit Rates
When you're encoding video, you're going to be dealing with bit rates. Bit rates are how much data is used for each second of video. Let's say you have a video that was encoded at 1000kbps. Despite what it looks like, that doesn't mean each second of video takes up 1000KB, but rather 125KB. In this case, kbps stands for kilobits per second, not kilobytes. Kilobits are basically eight times the number of kilobytes, so you can get kilobytes per second by dividing your number of kilobytes by eight. If your video was exactly 94 seconds long and encoded at a bit rate of 1000kbps, that means it would be 11.75MB in size. This is all assuming that every second of video equals exactly 1000 kilobits, which is only the case if you encode at a constant bit rate (CBR). CBR encoding is generally used for streaming media to keep the flow of data as consistent as possible, but for progressively downloaded video (what you find on YouTube, Vimeo, and most other video sharing sites) you're better off encoding at a variable bit rate (VBR). VBR encoding can work in a couple of ways, but most encoders just have you specify a single number (in kilobits per second) as the average bit rate. This means that if you specified 1000kbps, each second of the video would be encoded at around 1000kbps. Some seconds of your video will not be as complex as others, so ones with lower complexity won't require all 1000kbps. The ones that require more will take more, and on average this will result in seemingly higher quality video without affecting the file size too much. There's more to it than that, but that's the basic idea.
Key Frames
One more thing you should know about encoding is key frames. Pretty much every codec you'll use to export video for the web, DVD, Blu-ray, etc., will have key frames. Codecs that don't use key frames are generally designed for editing purposes because they're less processor-intensive and therefore make editing a bit faster. The DV codec is one such codec. Compare it to H.264 and see how much faster it is when editing. So what are key frames? Key frames are the full picture. Let's say you have 30 frames of video and the first and 30th frame are key frames. You can think of those frames like photos—all the detail of the video exists in that frame. Frames 2 through 29, however, do not have the full picture. Instead, frame 2 just contains the changes that have happened since frame 1 because frame 2 is not a key frame. How often do you need to use key frames? Less often than you'd think. Every six seconds is customary nowadays, but the more key frames you have the easier it is to scrub through the video. The downside is that more key frames tends to result in lower-quality video. Why? Because it takes a lot of data to store a key frame, and if you only have 1000 kilobits (or whatever) every second, the more frames in that second that use a full frame mean you have less room to store the changes between those frames. If you use key frames too frequently it'll degrade the quality of those changes and the quality of those key frames to try and stick to the average bit rate. It may seem like many key frames is better, but you generally just end up with a lot of lower-quality key frames and, therefore, lower quality video.
How to Design an Encoding Specification
When designing a specification or a preset of your own, the first thing you need to figure out is how you're delivering your video. If you're delivering it on the web, you're not going to want to target anything slower than the slowest broadband connection because anything at that level isn't really fast enough to handle video worth watching in the first place. (Well, unless it's a cellphone, but we've learned to be patient with those.) The slowest broadband connection you're going to find is probably the 768kbps DSL connection. This is the peak data rate, so if you're thinking you should encode your video at 768kbps you are setting yourself up for trouble. If you're reading this, you're paying for an internet connection. Does it always perform at the peak rate? Probably not. If you want people to be able to progressively download your video in real time you need to take the lowest target connection speed and reduce it by one third. For 768kbps, that's 512kbps, so you want to encode your video at 512kbps. This is really only a useful bit rate for standard definition video and so you shouldn't use it with anything larger than 640x360 or 640x480. Around 1000-1200kbps is a good target video bit rate for 720p files and 1080p should be twice that, if not more. If you're simply creating a source file to upload to YouTube, Vimeo, or some other video service, those bit rates can be much higher because those sites will re-compress the file using their own standards. If that's the case, you should allocate bit rates closer to 3500-4000kbps for 720p and 8000-9000 for 1080p. Since your video is getting compressed for a second time, this extra quality will make a difference in the final product people see when you upload it to a video sharing site. As far as audio goes, I like to use 192kbps for MP3 or AAC audio, although you'll need to keep it to 160kbps if you're encoding for an Apple device. Why? Good question.
All of the suggestions mentioned in the last paragraph are based on the H.264 codec, but they should work well with pretty much any modern codec. The better the codec, the lower the bit rate can be. That means that 512kbps will look a lot better in H.264 than it will if you use a codec that's not as good. Try encoding a file at 512kbps using both H.264 and the standard MPEG4 codec. You'll see a difference, although it may be a little subtle.
The Most Important Thing You Should Know
Don't mess anything up!
Yeah, in a perfect world, right? The thing is, if you shoot terrible quality video your encode will look even worse. Sometimes you will shoot terrible video and you won't even realize how bad it is until you encode it and it looks like someone blurred out all the detail.
A lot of us think our poorly-lit video looks pretty good at 1080p, but that's because you're getting quite a bit of detail at that resolution. That video is also at a really high bit rate, so detail is retained. The more you compress your video the more detail is thrown out, so if your video isn't well shot or lit, you're going to lose a lot more detail when encoding than you would if you just shot it properly in the first place.
While it's easier said than done, do the best you can do get the highest quality video you can before you bring it into post production. We can do some amazing things in post, but nothing miraculously turn your poor quality footage into a work of art. In fact, there's almost nothing you can do to save bad footage regardless of how good you are. You just can't find detail that isn't there.
So before you sit down to create your amazing film, how to video, or whatever, take the time to shoot it well with good light or you will be kicking yourself when everything is over. It sucks to put a ton of work into something and then find out it looks terrible when you put it online or on a DVD, so do everything you can to make it look good so you don't have to try to salvage it in post.
Final 60 Second Commercial
DUE Friday, May 31 at the end of class.
1. Must be 60 seconds exactly, No more, No less.
2. Must persuade us to believe we need the product.
3. Story must demonstrate the quality of the product you are emphasizing.
4. Commercial must have a main claim
5. Commercial must have a call to action
6. Commercial must have contact info
7. Must have product shot at the end
8. Must turn in updated storyboard
9. Turn in authorization form
10. Reflection on
1. Your experience creating a commercial,
2. Your experience working in premiere.
Deliverables
1. Proposal
2. Outline of Commercial
3. Storyboard of Commercial, Annotated with Camera shots info and description of scene
4. Commercial
5. Reflection
5/15/19 - 8 Step - How To Movie Final
Due 5/17/19 at end of class
5/13/19 - 8 Step - How To Movie Pre-Planning
|
Due Wednesday, May 15 at 11:59 PM - Proposal, storyboard and How To Clips.
How to make an 8 Step Movie STEP ONE 1. Read the Authorization form. You must review your videos everytime for items in this list 2. Fill out, then Turn In the Proposal Form - for this project, dont worry about the timeline yet. 3. Complete a Storyboard Form. Review Camera Angles Lecture for angles to include in this video STEP TWO You will create a movie based on a demonstration of how to do something simple, like tie a shoe. Here are the requirements 1. Choose an event to demonstrate. Keep it simple, like how to pour a glass of milk, how to sharpen a pencil etc. 2. Proposal Must submit a proposal of the entire movie idea. Use Proposal form. - dont worry about the timeline section, just fill out the first page It must be cleared by teacher to progress to the next step. 3. Storyboard Storyboard your movie idea. Show the progression of steps to complete your demonstration. Refer to the Camera Angle lecture, and choose the best camera angles to most clearly show the viewer each step in your story. Must submit storyboard showing at least 8 steps and 4 camera angles Use storyboard form. It must be cleared by teacher to progress to the next step. 4. Shoot Your sequence. Using your camera phone or a still camera, shoot your demonstration sequence. Be sure what you are trying to demonstrate is clear and precise. You are telling a story, so you don't want anything to be confusing or not clear. Think about camera angles, points of view etc. Must show at least eight steps to the how to movie Must include at least 4 different types of shots Work these out in your storyboard. 5. Must comply with all of the common sense statutes in the Authorization form. 6. Upload clips to your Google Drive. Make a folder for this project, then a folder for the clips. Upload them to your clips folder. Then share the clips folder. Your clips are due on Wednesday May 15th at 11:59 pm. 7. Editing. We will be editing these shots together. 8. Final piece. Your final piece will be an 8 shot sequence with titles, Open and Close Screen. |
| ||||||
The Storyboard
|
4/29 - Storyboard presentation
4/30 - Storyboard Exercise Due 5/8 at end of period. Focus on your morning routine. What did you do before you got on campus. There is a story there somewhere. I want you to think of the details of each thing that you did, and storyboard your morning routine. I need a detailed storyboard, with proper annotations, directions, camera angles etc. think about the best camera angles to tell your story |
|
|
| ||||
Commercial Brainstorm
|
Due Sunday, April 28, @ 11:59 pm
List at least 10 different ideas for your commercial. Each idea hould be explained in a sentence or two. Please see the example as to what is expected for you to turn in. Once you are done, upload it to google and share it. Focus on quantity: This rule is a means of enhancing divergent production, aiming to facilitate problem solving through the maxim quantity breeds quality. The assumption is that the greater the number of ideas generated, the greater the chance of producing a radical and effective solution. Withhold criticism: In brainstorming, criticism of ideas generated should be put 'on hold'. Instead, participants should focus on extending or adding to ideas, reserving criticism for a later 'critical stage' of the process. By suspending judgment, participants will feel free to generate unusual ideas. Welcome unusual ideas: To get a good and long list of ideas, unusual ideas are welcomed. They can be generated by looking from new perspectives and suspending assumptions. These new ways of thinking may provide better solutions. Combine and improve ideas: Good ideas may be combined to form a single better good idea, as suggested by the slogan "1+1=3". It is believed to stimulate the building of ideas by a process of association. Brainstorming Rules: No idea is dumb. All ideas are needed. All ideas are recorded. Each person should contribute. Let ideas generate other ideas. Don’t go into great depth explaining ideas; deal in simple thoughts. No one can decide what ideas are good or bad during a brainstorming session. Selecting a Topic Once ideas have been brainstormed, you can use the following four-step process to decide which idea is the best for the group. Otherwise, it will turn into a one-person production whether you want it that way or not. The more support an idea has within the group, the more cooperation you will get. Step 1: Most ideas will have some similarities to other ideas. Group them into categories accordingly. Step 2: Discuss the categories. Decide which categories are the most interesting to the group and which would be interesting to an audience. Eliminate the categories that don’t meet these criteria. Step 3: Do preliminary research to find possible sources of information about each category. This step is taken to determine which categories can be accomplished in the allotted time. Research sources may include library materials; community resources such as local government agencies, civic organizations, historical societies and knowledgeable residents and the Internet. Step 4: Choose the topic based on the following questions: 1. Is it interesting? 2. Will it interest the target audience? 3. Is there enough information available? |
| ||||
Shark Tank
Due Sunday at 11:59 pm
Watch one of the following pitches from the television series, Shark Tank http://abc.go.com/shows/shark-tank.)
Answer these questions following the screening:
Imagine that this particular "client" is looking to develop a commercial for their product and have hired you as a designer.
What questions would you ask the client in order to learn more about their needs, wants and the product itself.
List 10 questions that you would ask this client. Make a google doc and share it. Be sure to inlude
1. Name of client
2. Your name and period Number
3. Product they are selling.
Watch one of the following pitches from the television series, Shark Tank http://abc.go.com/shows/shark-tank.)
Answer these questions following the screening:
- Who is the audience?
- Color Schemes associated with product
- Overall tone in the graphics and presentation of product
- What is the main claim of their pitch
- What went wrong with their pitch
- Where could the pitch been better
- Did the sharks make them an offer? How many sharks?
- What was the final deal that they took?
Imagine that this particular "client" is looking to develop a commercial for their product and have hired you as a designer.
What questions would you ask the client in order to learn more about their needs, wants and the product itself.
List 10 questions that you would ask this client. Make a google doc and share it. Be sure to inlude
1. Name of client
2. Your name and period Number
3. Product they are selling.
Client Research and Meeting Preparation
|
Due Friday, April 17/18 at end of class.
So the next step as a graphic Designer is to meet with the client to find out their thoughts and needs for the Ad that they are hiring you to build for them. As an exercise, you will be meeting with eForce. You will review the background of E-Force by looking at their website (www.eforce.com) and will prepare for your client meeting by answering the following questions about the company: Download the worksheet to the right. |
| ||
Ad Analysis Homework
|
04/11/19
Due on Friday, April 12, at the end of the period You will choose THREE of the Advertisements posted to the right and answer the questions on the Ad Analysis sheet for EACH AD. Turn in one worksheet for each ad. Put them in a folder and share the folder to [email protected]
|
| ||


DVD Commercial Project
|
UNIT ONE - Advertising
04/09/19 - Principles of Advertising Presentation |
Spring Break
Signature Tile Design
|
Due Wednesday, March 3, at the end of the period
Repetition and Pattern In this project, you will be creating a repeating pattern design out of your signature. The objective is to make a simple design become a more complex and completely different design through the use of color and repetition. By repeating the same shapes, you will create a pattern that should create a feeling of rhythm and movement. Objective Understanding Closed shapes and how to fill them Using the transform, paint brush, and paint bucket tools Using creative thinking skills to figure out how to create a unique design using your name. Color theory. You will create two different tile designs. As you execute it in Photoshop, you will choose 2 different color themes to work with, one for each of your designs. Choice between Monochromatic, Analogous, Primary, Complimentary or Tertiary. Please review the Color Wheel powerpoint posted to the right |
| ||||||
2/12/19 - Metamorphosis
|
met·a·mor·pho·sis (mĕt'ə-môr'fə-sĭs)
A transformation, as by magic or sorcery. You will use your magical powers and the tools in Photoshop to create a new animal by combining two or more together. The idea is to blend them so seamlessly that one cannot tell it has been created in Photoshop. Study the colors in the body of one vs the head of another. Can you make the two into one with out seeing the seem? You'll also want to combine two that creates a believable animal. Possible tools:
Deliverables: 3 New Animals (3 separate files) Name each one 1 reflection on your experience of the process. Explain successes and difficulties of each animal. Give your new animal a name Rubric: Craftsmanship (10 pts) Transitions/Edges (10 pts) Color Correction ( 5 pts) Creativity ( 5 pts) TOTAL (30 pts possible) |
|
2/06/19 - Juxtapose Yourself
|
Juxtaposing your portrait into famous artwork
Select a painting from the list of the top 100 famous paintings. Choose only those paintings that are a bust, meaning chest and above. If you choose a full body pik, it will be too far away to see your work. No full scenes, just a bust of a famous painting. https://www.1st-art-gallery.com/Portraits.html You can find a large file, or scan artworks from Art reference books. Use digital cameras to take photos of yourself in a way complementing the artwork. Students must use filters, tools and blending options to juxtapose themselves SEAMLESSLY into the artwork. Before taking photographs, it is critical to know what painting you are going to be working with to try to match the pose and lighting. Experiment with various filters to achieve a similar "brush stroke" to the original image. If you need quick visual references or a place to get ideas, the following Internet sites are helpful. (www.artchive.com or www.artcyclopedia.com) This is a great resource for altering color in Photoshop. Of course, you will still need to apply filters to make your face look like it was supposed to be there. |
|
2/05/19 - Photo To Line |
|
| ||||||
1/30/19 - Contrast Mask |
| ||||||||
1/30/19 - Quick Mask |
|
| ||||
Digital Media Showcase Link
1/29/19 - Painting |
|
| ||||||||||
1/28/19 - Selection |
| ||||
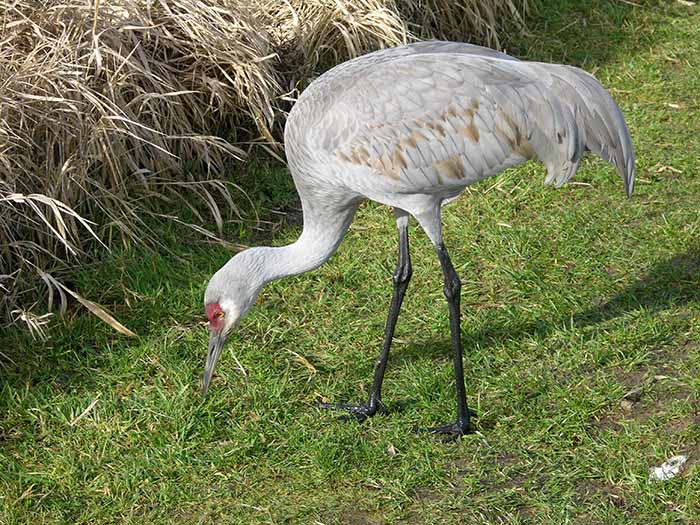
1/28/19 - Crane
|
You will learn to change the color of a shirt to another color without affecting the other parts of the photo.
|
| ||||||
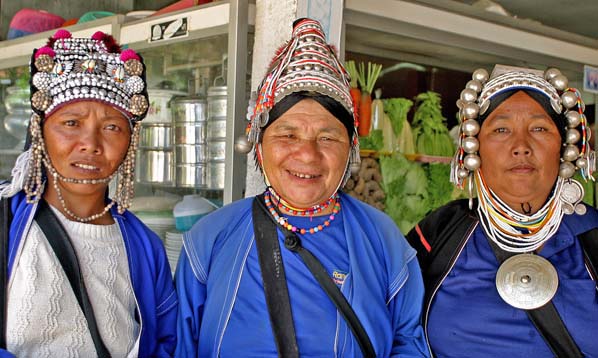
1/25/19 - Color Replacement
|
You will learn to change the color of a shirt to another color without affecting the other parts of the photo.
|
| ||||||
1/25/19 - Unsharpen Mask
| |||||||
1/23/19 Stroke Effect
|
You can use the Stroke command to paint a colored border around a selection, layer, or path.
This allows you to create a softer border. Download the files to the right to a new STROKE EFFECT folder in your exercises folder. |
| ||||
1/23/19 Soft Filter
| |||||
1/22/19 VIGNETTING
|
Due at the end of the period
DOWNLOAD THE PDF TO THE RIGHT AND FOLLOW THE INSTRUCTIONS. DOWNLOAD THE PORTRAIT PICTURE TO A NEW FOLDER CALLED PORTRAIT. When done, repeat the steps for the flower, and again for the sunset. |
| ||||||||||
Voluntary Survey
This survey is totally voluntary. To support LGBTQ+ student efforts, this survey is being provided to collect honest information.
You may fill it out anonymously if you wish.
Click the link to get to the survey.
goo.gl/forms/3bMywoEbuzyZPGEp2
You may fill it out anonymously if you wish.
Click the link to get to the survey.
goo.gl/forms/3bMywoEbuzyZPGEp2
1/17/19 Selection and Layers
|
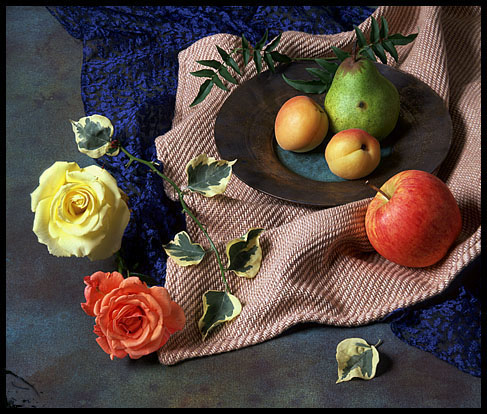
Today we will learn about the selection tools and about layers
1. Lets create a new folder called Fruit, and put ti in your exercise folder from yesterday. 2. Download the .jpg file to the right and save it to your FRUIT folder as well. 3. Download the instructions file and save it to your FRUIT folder also. 4. Begin with step 1 from the instruction sheet. |
| ||||
1/16/19 - Intro to Photoshop
|
Today we will get started with the Toolbox and interface of Adobe Photoshop.
1. Lets start by creating a new folder in our Desktop >MultiMedia > Exercises folder and name it PHOTOSHOP. 2. Download the pdf posted to the right. 3. Open photoshop. 4 We will go through it together in class. |
| ||
Semester Break
Step 4 - Identities Logo Powerpoint.
Due Tuesday, at end of class, December 18
The final step to your project is to make a presentation that explains all the steps you took to get to the final design. Remember, I dont want any pre-made background templates! Be sure to make your own, and not the one you used for the scavenger hunt project
Slide 1
Title Slide. Include your name, class period, project name
Slides 2-3
This is where you should state your name and summarize what you learned when you did the Identities assignment. That was where you asked the family history and the meaning of your name. Give us the background of how you got your name and what it means or represents.
Slide 4-5.
Show us your word list. Explain what you learned from this step and how you got so many words. Tpe it into the document, dont place a scan of a hand-written list.
Slide 6-8
Show us your word pairings and your set of sketches for each pair. One pair per slide. You may have to crop the original picture that you turned in for the thumbnails assignment. We want to see clearly what you drew for each pair.
Explain how you came up with the drawings
Slide 9
Show us your final Illustrator Logo. Explain each part and how this represents you.
Slide 10
Reflect on this assignment and tell us what you learned about yourself from executing this project.
NOTE: To get your final .ai logo file into google presentation, we need to change the file format first.
Step 1 - Open Adobe photoshop.
Step 2 - Open your logo file in photoshop.
Step 3 - Make sure your color mode is in RGB, so go to IMAGE > MODE > RGB.
Step 4 - Choose FILE > SAVE AS. A pop-up window will appear.
Step 5 - In the FORMAT box of the pop-up window, Choose CompuServe GIF.
Be sure you have the destination pointed to the correct folder.
Step 6 - Then choose SAVE from the pop-up window
Share the powerpoint to [email protected] to turn in your final.
Step 3 - Identities Logo
|
Due, at the end of class Friday, December 14
Now that you have 5 drawings (thumbnails) for three different pairs of words that are from your name list (Thats 15 in all minimum), you have a great start on your name logo. Choose the best of each of the 3 groups, and construct them in illustrator. Design your name into the design to make a complete logo. Remember, these pairs are representing you and can become the imagery of your logo, but we still need your name in the logo!!! We are not designing a picture, we are designing a logo. THE NAME IS THE MOST IMPORTANT PART. Remember the skills that you have learned from the broker sign and the retro badge logo assignments, as well as the texture, text effects, color theory and all the techniques from all the tutorials we have completed.. Rubric: I am looking for good use of the pen tool, color theory, use of compound paths, use of patterns, textures, typography, and creativity. |
|
Step 2 - Identity List
Due, at the end of class Wednesday, December 5
Step A - List
Begin compiling a list of 40 words that describe you, your name story, your family, your character, your interests etc. Use your name. We want descriptive words. If you are an athlete for instance, describe the kind of athlete you are rather than list the sports you play.
Step B - Matching
From your list, choose Three (3) pairs of words. Match words that offer a funny or unique pairing. The more naturally the words go together, the less creative or more expected the result will be. For instance, "green" and "pants". These 2 words naturally go together, so there isnt an unexpected outcome from this pairing. While "cereal" and "mustache" could create some very interesting images.
Step C - Drawing
Now make a drawing of your interpretation of the two words together.
Make Five (5) drawings for each of the 3 pair of words as a minimum quantity.
Deliverables:
The more quality drawings/pairs you do, the better your chance of a higher grade.
Thats 15 drawings in all, plus the word list.
Step 1 - IDENTITIES
YOUR NAME STORY
Due by 11:59 pm Tuesday, December 4
Source https://99designs.com/blog/famous-design/pepsi-logo-history/
Sure, we know each other’s names, but do we know the story behind that name?
Think about the story of your name.
Create a new Google Doc, name it “Identities”
Sit down with a family member, mom, Dad, Grandparent, Aunt etc and ask them questions 1-8
write down your answers and thoughts and feelings about the story of your name. then on your own complete questions 9-18
1. State your name, age, birthday, place you were born
2. Why did your parents choose your name?
3. What is the family History?
4. If you were named after someone, who was it?
5. In what country did your name originate?
6. What does it mean?
7. How do you feel about it?
8. Would you change your name? To What?
YOUR HOBBIES
09. School subjects and activities you excel in
10. Your personality
11. Your role models
12. Your plans after high school
13. Your favorite foods
14. Your favorite things to do not at school
15. Your favorite music groups or singers
16. Favorite colors
17. Things you do for fun
18. What were 3 stories from the news that happened the day that you were born.
Share your Doc to [email protected]
11/28 - Digital Scavenger Hunt 1
DUE SUNDAY December 2, 2018
Take the words from the word list below, and make a powerpoint/Google Slides presentation. One word per slide. Find the most outrageous photo to use as an example of the word.
DO NOT USE THE STANDARD TEMPLATES FROM THE PROGRAM. BUILD YOUR OWN MASTER SLIDE!!!!!!!!!!!
You must include your sources! You can make a references section in the back, or include it on each slide as in the example.
This project is about perception, creative thinking and digital media use. Be inspired to show the world through your eyes.
1. Site the definition for each of the words, the phonetic breakdown and the part of speech
2. Find a picture that expresses the essence or the spirit of the word.
REMEMBER- Don’t stop at your first idea. Find the most eccentric way out example of the word. Be creative, use the definition to help you find the most expressive picture you can find…..and have fun with it.
EXAMPLE
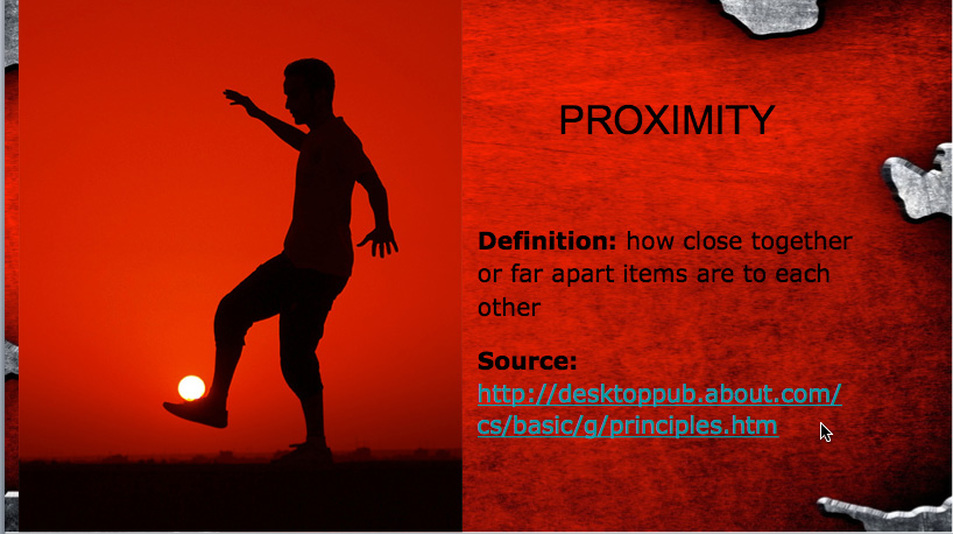
proximity [prok-sim-i-tee]
noun
1. nearness in place, time, order, occurrence, or relation.
Although his presence was sporadic and invisible, just the thought of hisproximity delighted and intimidated me.
Show me a picture that exemplifies this definition. Keeping with the context of graphic design.
Use the word list below
Take the words from the word list below, and make a powerpoint/Google Slides presentation. One word per slide. Find the most outrageous photo to use as an example of the word.
DO NOT USE THE STANDARD TEMPLATES FROM THE PROGRAM. BUILD YOUR OWN MASTER SLIDE!!!!!!!!!!!
You must include your sources! You can make a references section in the back, or include it on each slide as in the example.
This project is about perception, creative thinking and digital media use. Be inspired to show the world through your eyes.
1. Site the definition for each of the words, the phonetic breakdown and the part of speech
2. Find a picture that expresses the essence or the spirit of the word.
REMEMBER- Don’t stop at your first idea. Find the most eccentric way out example of the word. Be creative, use the definition to help you find the most expressive picture you can find…..and have fun with it.
EXAMPLE
proximity [prok-sim-i-tee]
noun
1. nearness in place, time, order, occurrence, or relation.
Although his presence was sporadic and invisible, just the thought of hisproximity delighted and intimidated me.
Show me a picture that exemplifies this definition. Keeping with the context of graphic design.
Use the word list below
|
WORD LIST:
BUTTONS RED SQUARE CLUTTER UNDERNEATH CAN'T LIVE WITHOUT STRIPES CURVY LINES SOUND |
EMPTY DELICIOUS UPSIDE DOWN SILENCE WATER PATTERN TOGETHER PUSH DEVELOP PASSION |
11/27 - Daily Lesson
1. The Art of Logo Design Off Book (Video)
2. Logo Design Presentation - TAKE NOTES!
2. Logo Design Presentation - TAKE NOTES!
11/27 Homework
|
Make a Collection of 15 Logos
Due at 11:59pm, November 27/28, 2018 Below, is a list of 5 categories that logo designs are classified by. Find 3 logos for each category. Read the description for each category, and identify them when you add them to the sketchbook. The goal of this assignment is get you started in thinking about logo design by researching what kinds of logos exist. Word Marks - comprised of text only, featuring a unique typographical treatment. There are no images or pictures. example: facebook or Sony. Abstract Marks/Symbols - represents the company in a simple but bold manner. In most cases, the image is abstract and stylized to give visual interest. No text is used in these logos. Example: Apple, Shell Oil. Lettermarks - exclusively typographic. They use a symbol representing the company through the use of its initials or the brands first letter. These are primarily text, These are primarily text, but may use some shapes or other minor embelishments. Example: Hewlett Packard, Gereral Electric. Combination Marks - logos combine a wordmark and a symbol or icon Emblem - encases the company name within the design. Find 3 examples of each of the 5 categories of logos. 1. Look around your house to find examples of the 5 different categories of logos. Check your magazines, newspapers, check in your cupboard on packages, etc. 2. Carefully cut the logo out and pate it in your sketchbook. 3. Identify which of the five categories the logo belongs to and label it. 4. Give a brief explanation of what the company does. 5. Do not use any of the examples shown here as one of your logos. 6. Take a picture of your sketchbook page (s) and share it to [email protected] |


|
Student Instructions for SWC credit |
| ||
Credit Request Sheet |
| ||
Choose Fall and Spring.
Write 2018_19 in year
Course # = Art 192
Sign and have parents sign.
You need to read Student instructions sheet also.You will need to register with Southwestern College and get a student ID # to include on your Credit request form
Write 2018_19 in year
Course # = Art 192
Sign and have parents sign.
You need to read Student instructions sheet also.You will need to register with Southwestern College and get a student ID # to include on your Credit request form
11/07 - Retro Badge
|
Due Monday, November 12.
This tutorial will help you create a vector retro badge or emblem. Particularly, in this year, the number of websites using these as attention grabbers is increasing, and it is being touted as a design trend that is not very likely to cease anytime soon. So, it becomes very important as a designer to know how to create these badges. Having these in your arsenal is sure to grab some attention! It is also a great way to improve your skills and expand your capabilities in illustrator. So what are we waiting for, let’s get started by downloading the file below. Don't forget to create a new project folder on your computer. |
| ||
11/06 - Pathfinder
|
Due at end of class Wednesday, November 7
We will be working with the pathfinder feature in illustrator with this tutorial. We are working towards having the skills to imagine, sketch, refine, and execute our own logo project. This exercise is another step towards that goal. 1. Download the pdf to the right, and follow the steps to create your pathfinder logo. 2. Create a new folder in your projects folder called pathfinder, and when you are done, 3. Upload your file to your google drive, and share it to [email protected]. |

| ||
11/06 - RING It!
|
Due at end of class Wednesday, November 7
To get us ready for our next project, we will create this ring by understanding the pen tool, elipse tool, the transparency palatte and color.
1. Download the pdf to the right, and follow the steps to create your Ring. 2. Create a new folder in your projects folder called Ring, and when you are done, 3. Upload your file to your google drive, and share it to [email protected]. |

| ||
10/31 - Squiddy
|
Due Friday, November 2.
The Basics of Clipping Paths and Opacity Masks What You'll Be Creating In this tutorial, we’re going to cover the benefits, some uses, and the ’how-to’ of two powerful methods to hide or show areas of an Illustrator document without deleting objects that you want to be invisible, which allows you to go back and re-work more easily. Download the pdf tutorial to the right. Put it in a new folder under projects folder called SQUIDDY. Build it according to the structure in the tutorial, but you can use your designer sense to color it the way you like. When you are done, upload it to a similar folder in your google drive, and share it to [email protected]. |


| ||||
10/22 - Simple LandscapePerform this tutorial to gain illustrator skills in preparation of our upcoming project.
Download the pdf tutorial to the right. Put it in a new folder under projects folder called SIMPLE LANDSCAPE. Build it according to the structure in the tutorial, but you can use your designer sense to color it the way you like. When you are done, upload it to a similar folder in your google drive, and share it to [email protected]. |

| ||
10/14 - Broker Sign
|
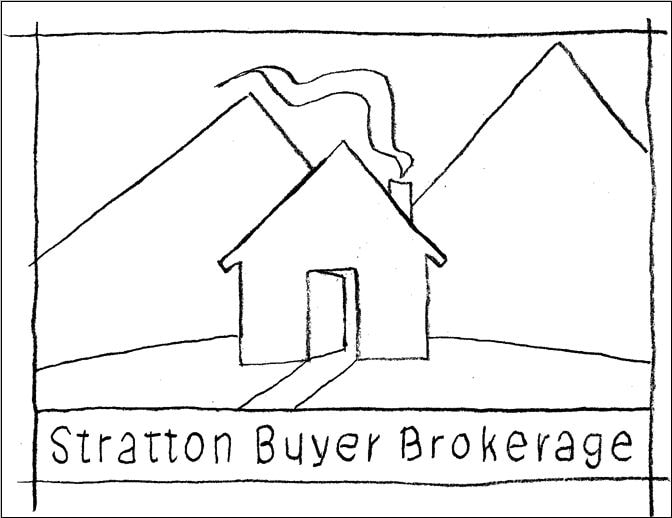
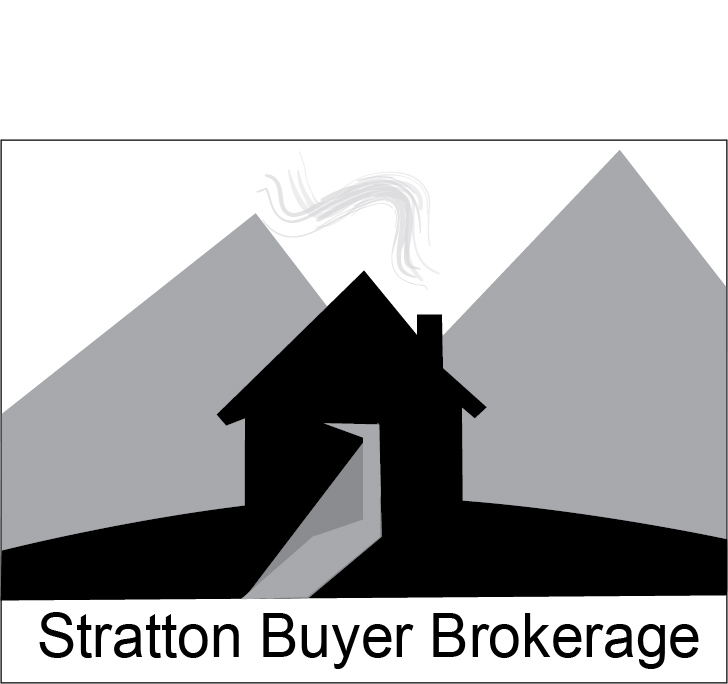
1. Make a folder inside your projects folder
and name it Broker Sign 2. Download the brokersign.jpg file to the right and save it to your Broker Sign Folder. 3. Launch Illustrator. Open a new document that is 11" wide x 8.5" tall. 4. Choose FILE>PLACE and navigate to the broker sign.jpg file. Select Place. 5. You'll notice that there are handles on all 4 corners. This tells you that the picture you placed is still selected. With it still selected, from the OBJECT menu, choose LOCK>SELECTION. This will keep the picture from moving as you draw over it. 6. Choose the pen tool and begin to draw each of the shapes. Each shape must be "closed" and on a different layer. 7. You can add embelishments if you want, but you will be graded on how complete you have made this drawing. I am looking for your skill with the pen tool, and your organization of the layers. |
| ||
10/10 Illustrator Exercises 3 and 4
|
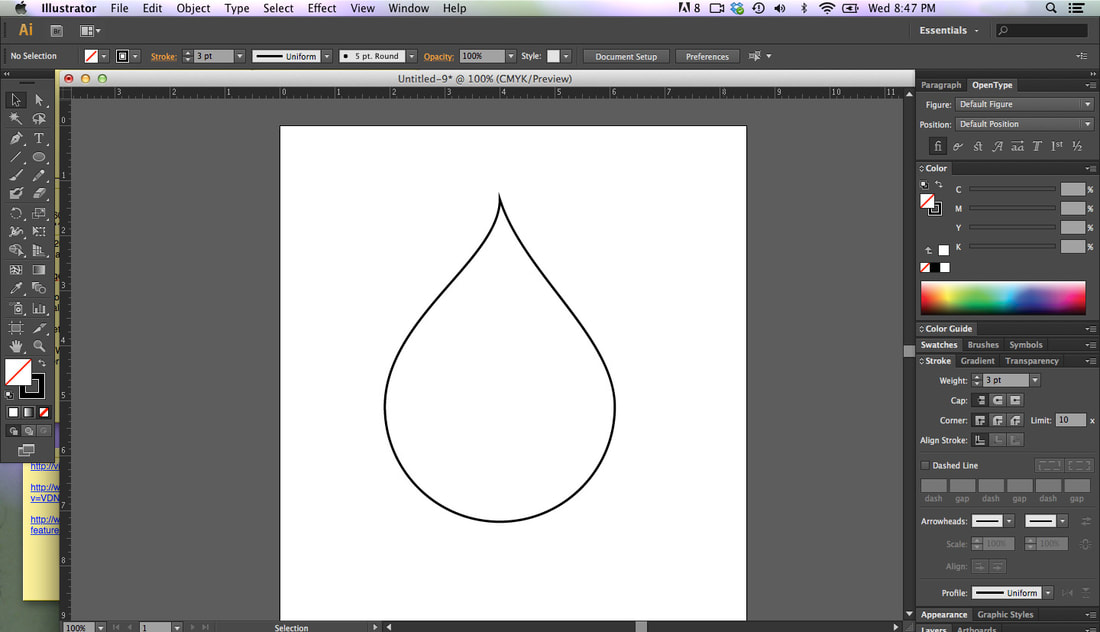
Due at the end of class on October 12
EXERCISE 3 1. Open Illustrator, create a new document as letter size, File > New. 2. Save it to your name folder on your desktop in a new folder called Tear Drop. 3. Name your file, Teardrop Trial. 4. Try to recreate the tear drop shape shown above. Use the pen tool and try to use as few points as possible. Remember, we make a line by showing illustrator the beginning and the end of the line, not by clicking a thousand clicks along the way. To curve the line, click and hold and drag the mouse to drag the handles out of the point. 5. Share the file to [email protected] EXERCISE 4 1. Download the file to the right. 2. Save it to your Name folder on your desktop. 3. Create a new folder titled Exercise 4. 4. Choose FILE >NEW to create a new file with a dimension of 8.5" wide x 11" tall 5. Choose File>PLACE and navigate to your name folder to place the exercise sheet file onto your illustrator document. Be sure to to lock it down (OBJECT>LOCK>SELECTION) It is a practice worksheet that has many boxes. Each box has a line or a shape. In the bottom half of the box, try to recreate the line or shape using the appropriate illustrator tool from the tool box. |
| ||
Linework Exercises
|
Due Friday, September 21 at the end of class.
Download the tutorials to the right, and complete them in Illustrator. Make a new file for each exercise. Remember, be patient and you will get this. |
Exercise 1
Exercise 2
| ||||
Neil Harbisson - I Listen To Color
Due Friday, September 14 at the end of class
Once you view it, answer these questions then write a reflection about what you find inspiring about his story.
Questions
1. Where did Neil Harbisson grow up?
2. What was the name of the condition he was born with?
3. Specifiacaly, what does the sensor do?
4. What 2 historical figures did Mr Harbisson compare speeches from?
Reflection
Relate his creativity process to some creative aspect of your life, and describe how it applies to you specifically.
Remember our reading skill of Describe and use it in your writing.
Formulate a position to take about what inspires you and why that is important to you, and support it in your writing.
I need well written sentences and well thought out answers. At least a 5 sentence paragraph.
Shape Ups
|
Due at end of class, August 1st, 2016
Many graphics and logos contain letters that are drawn to form the shape of an object or an idea. There is freedom to drawing these types of words because there are no rules - the letters can simply morph into whatever you want them to be. A. Make a list of 5 Target words that are not objects. Remember our example of emotions or words like that. B. Pick the one you like the best. C. Now, make a list of 5 outline words that you can make outlines of to put your target word into, that would help to describe the spirit or meaning of your target word. D. Now make at least 3 sketches of each outline word with your target word inside E. You should end up with at least 15 sketches. F. These are to be made in your sketch book. Take a picture with your phone, upload it to your google drive, and share it with me at [email protected] Step 1 Draw a faint simple outline of your object. Step 2 Draw the middle letters of the word in the center of the outlined shape to establish the spacing of the letters. Step 3 Add the remaining letters. Step 4 Erase your outlined shape and refine your letter shapes Step 5 Add Color. Turning it in 1. Take a picture of your finished work and of all your sketches. 2. Upload them to your Google drive in a folder for Multimedia, and inside that a folder for Shape ups. 3. Share it to [email protected] |


|
8/24 RODNEY MULLEN
Once you view it, answer these questions then write a reflection about what you find inspiring about his story.
Questions
1. When did Rodney win his first amatuer championship? And his first World Championship?
2. What is his nickname in the skating world?
3. What happened in the skating world that made him feel liberated?
4. What does Rodney mean when he says context changes content?
5. What was ironic about hime speaking at USC?
Reflection
Relate his creativity process to some creative aspect of your life, and describe how it applies to you specifically.
Remember our reading skill of Relate and Apply and use it in your writing.
Formulate a position to take about what inspires you and why that is important to you, and support it in your writing.
I need well written sentences and well thought out answers. At least a 5 sentence paragraph.
8/13 OCCUPATIONS PRESENTATION
Due @ 11:59pm Sunday August 19th, 2018
SPECIFICATIONS
Length: Your PowerPoint must be a Minimum of 20 slides.
Text: Your Title slides must be easy to read:
Tips: Choose fonts that are clear and simple. Choose good color contrast. Must be able to be read from across the room when being presented (don’t use too small of a type size.) Don’t use too busy of a background.
Creativity: Remember that completing the minimal project requirements will earn C work. Adding more information, pictures, descriptions/explanations etc that are relevant and serve to a better understanding for the audience will earn the higher grades. So push past your first attempt, and dig deeper for the more interesting pictures, or the more intriguing facts. You want to visually communicate what the job is all about. This also is your first "design" project, so give it your best shot at being aesthetically pleasing.
TIPS:
1. Don't use too many font families or styles. Two fonts are usually enough, but you decide what looks best.
2. Don't have too many facts on a slide. We need to see it from across the room when presented. It is OK to have more than the required number of slides. When you have paragraphs of info on one slide, the text gets too small. Generally speaking, you want to have just one thought per slide.
3. If you put text or headlines over a photo, make sure the text is still readable. You shouldn't have to strain to read it. If you do, you will lose your audience.
4. When getting the content for this project, don't plagiarize!
DOCUMENT YOUR SOURCES
DO NOT COPY AND PASTE FROM ANY SOURCE. THIS IS IN YOUR OWN WORDS!!!!!
Use this as a check list as you progress through the completion of the project. This is just as much a design project as it is a written assignment. How it looks is as important as what it says. It is all part of the story you are telling.
SLIDE CRITERIA:
Slide 1- Title Slide
Must include: Occupation name, Your name, Period # and Fall 2018
Use a background image that will be relevant to your topic.
Slide 2-3 Skill Set
Must Include: Job Skills Needed: Minimum of 6.
“Describe” what the skills are. Don’t just make a list that doesn’t communicate anything.
Slides 4-6 Work Station
Must Include: Photos of Typical Workdesks or Workstations or workplace
2 or 3 Important Facts per slide describing it.
(facts can be on separate slide so as not to interfere with pictures if you like, as long as there is a caption under the photo to identify it)
Slides 7 - 8 Compensation
Must Include: Salary statistics for the Occupation
Must have the National; Regional; and Local statistics
Slide 9 - 10 Descriptions
Must describe in detail What They Do
Show examples of what the work looks like
Slide 11 - 13 Training, Qualifications, and Advancement
What formal training/education is required for entry into this occupation.
Are there degrees, certificates etc? Name a few colleges or universities that have the degree you would need.
Slide 14 Professional Organizations
List the Professional Organizations/Associations affiliated with this occupation (Unions etc)
Give a short description of each, explain their purpose
Slide 15-17 Favorite Person
Choose your favorite or a famous person from this occupation:
Include Name, birth date, his/her contribution to this occupation or the industry as a whole, and why you chose him/her
Slide 18 – 19 Your interpretation-
Why did you choose this Occupation?
What are your final impressions about this Occupation?
What impressed or stood out to you the most about this occupation while doing your research?
Slide 20-21
Your Reflection.
Slide 20+ References:
Include the website URL for each of the facts that you used in the project. You must site your work, or it will be considered plagiarism.
Jarret Krosoczka Video
Due by 11:59, Thursday 8/9
View the above video
vimeo.com/233843255
https://www.youtube.com/watch?v=_k0ywFgMpFk
Once you view it, answer these questions then write a reflection about what you find inspiring about his story.
Questions
1. What were the obstacles that Jarrett encountered as a young child?
2. What people in his life were helpful and kind to Jarrett and how did they make a difference in his life?
3. How did his passion for art help him throughout his life?
4. What is your overall impression of this artist and his story?
Reflection
Relate it to some creative aspect of your life, and describe how it applies to you.
Remember that our reading skill for the month is describe, so be descriptive in your writing.
I need well written sentences and well thought out answers.
Formulate a position to take about what inspired you and why that is important to you, and support it in your writing.
JarrettJKrosoczka_2012X-480p from steve exum on Vimeo.
Copyright Basics Activity
|
Tuesday, August 7
What is Copyright? Due, August 7 @11:59pm Copyright is the right to use ideas or information created by someone else. The copyright law is intended to protect the rights of content developers and describes restrictions that can be placed on copying materials. In other words, if you create information, you should get credit. This credit can come in the form of money if you sell the information in a book, CD, or subscription Internet service. In some cases, people aren't concerned about money, but they want to make certain that their name or organization is associated with the information. In a global community such as the Internet, the laws become an issue. For example, the copyright laws in different countries vary. Class Activity Read the first three and a half pages of the document posted to the right, stop before Notice of Copyright. Condense your findings down to bullet points and report all the key elements of the sections. Use Google Docs and share it, title it Copyright Basics |
| ||
Copyright
|
Monday, August 6
Academic Literacy Plan Describe, Analyse Explain The creative process sometimes requires that a creator borrow materials that are made by others. However, using someone else's materials in the pursuit of your own creativity might also violate the copyrights of the original maker. The Web is full of "mash ups" or the mixing together of media derived from the creative works of others. New Vocabulary Mashup: A work (video, song, etc.) created by blending two or more original works. To the extent that such works are "transformative" of original content, they may find protection from copyright claims under the "fair use" doctrine of copyright law. Originality: A work is original if it is new or novel, distinguishing it from reproductions, clones, forgeries, or derivative work. An original work is one not received from others nor one copied based on the work of others. A derivative work is a creation that includes major, copyright-protected elements of an original, previously created first work. Producer: Someone who manufactures or creates something. Copyright and Fair Use 1. We will watch the Original Double Rainbow video followed by the Double Rainbow Auto-tuned* (5 min.). 2. We will break into small groups, and discuss the following questions (5-10 min.): 1. In your opinion, what, if any, rights does the original producer of this work have regarding the use and distribution of the work? 2. Does the derived work (the auto-tuned version) violate the rights of the original owner? Is it harmful or helpful? Explain. 3. Are there any benefits you can imagine to society from this free flow of material and derived work? 4. Our groups will share out their findings (10 min.) 3. Next, view the two clips Auto-tune the News: Bush vs. Kanye and Auto-tune the News: Backin' Up. Discuss the following questions (5-10 min.): Are these original or derived works based on the description of originality? Explain. 4. For the final example, view Tiger Woods Original Nike Commercial and Tiger Woods Commercial. Discuss: What are the implications of this type of satire/critique when it can be done by anyone and distributed anywhere? |
| ||
|
Tuesday August 7th
Due at 11:59 pm DLT By the end of the period, I will understand the concept of copyright as evidenced by my findings through group discussion Hook Play the copyright rap Video. They will see the legal consequences of not complying with copyright law ALP Describe Analyze Using Google Chrome, download the pdf Copyright Basics (Official) posted to the right. Break into 3 groups, each group reading one of 3 sections Assignment Read the first three and a half pages of the document, stop before Notice of Copyright. Condense your findings down to bullet points and report all the key elements of the sections. Use Google Docs and share it, title it Copyright Basics |
| ||
Monster Doodles
|
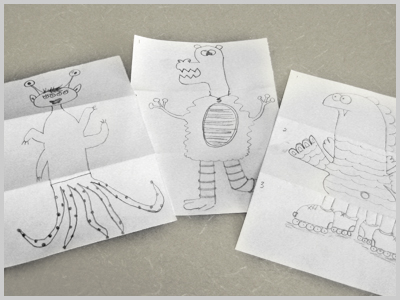
Due at end of class, August 3rd, 2018
This mini-exercise requires the company of at least two other friends. Together, the three of you will be collaborating to create a monster. The trick is that you won’t see what each of you will draw until the very end. First, fold three pieces of paper into three linear sections. See picture #2 at right to see how to fold it. On each folded section write a number 1 for top, 2 for middle and 3 for bottom. Each person gets a piece of paper and starts to doodle a monster head on the top section 1. Get creative! It can have 20 eyes, three mouths, a Mario Bros hat on, whatever you want to draw is perfectly fine, as long as it is school appropriate. After each person is done, pass the paper to another person in your group. Now everyone begins to draw a monster mid-section on the #2 panel of your piece of paper. Once again, pass the paper around and then have everyone draw the legs and feet (or slime blob if your creature has no legs or feet) on section #3. After everyone is done drawing, open up your papers and see the finished monster creation that you have drawn together with friends. |

|
8/1 or 8/2 SLIDE INTERPRETATIONS
Due at end of class 8/1 or 8/2
Write a sentence that shows a positive outlook for each of the following situations
Write a sentence that shows a negative outlook for each of the following situations.
Situations:
Write a sentence that shows a positive outlook for each of the following situations
Write a sentence that shows a negative outlook for each of the following situations.
Situations:
- You depend on a friend to pick you up from work. He does not come
- A parent has to meet your teacher at school
- You are applying for a job
- Your parent breaks an arm at work
- The family car has engine trouble
- Your peer tells you that you are doing something wrong
7/31 - ATTITUDES VOCABULARY
TUESDAY 7/31
Due at end of class 7/31/18.
Define the following words in your own words.Re-interpret the definition, DO NOT COPY AND PASTE from the internet.
Think about the context and pull from your own experiences.
Vocabulary:
Tolerant Enthusiastic Positive Reliable
Negative Uncooperative Courteous Lazy
Dependable Honest Intelligent Careful
Flexible Mindset
Create the list in your Google Docs, and share it to [email protected] when you are done. Please include your name and period number in the subject line of the email.
7/25 - Expectation Contract
|
Contract Due July 30, 2018
Download it from the downloads page, print it out, and have both you and your parents sign it, then turn it in on or before July 30, 2018 |
| ||
7/25 - Materials You will need for class
|
Due Monday August 6th, 2018
See materials handout posted to the right Item Description Estimated Cost 1. Must have a gmail account. Free 2 16 or 32 GB SD Card $10 Suggestion: www.walmart.com/ip/SanDisk-Extreme-Plus-SDHC-UHS-1-Card-16-GB-1-0-CT/24471384 3. (1) 9 x 12 hardcover sketchbook $10 - $15 range Suggestion: www.walmart.com/ip/Bienfang-Hardcover-Spiral-Sketch-Book-9-x-12-75-Sheets/25099620 Donated Materials List These are items that we need in class, but the district does not supply for us. Donations are completely voluntary. Due at any time. Any quantity Paper Towels Disinfectant Wipes Hand Sanitizer Tissues Box Scotch Tape UHU Glue Sticks ( Jumbo size) |
| ||
7/24 - Google Account/Inspirational Quote
Due, @ 11:59 pm Sunday, July 29th, 2018
Send me an unbelievably inspirational quote from your google account.
Be sure it is an account with your name in it. I wont know who [email protected] is.
This must be a gmail account, not yahoo, hotmail or anything else, just gmail.
Send me an unbelievably inspirational quote from your google account.
Be sure it is an account with your name in it. I wont know who [email protected] is.
This must be a gmail account, not yahoo, hotmail or anything else, just gmail.
