Del Mar Fair
|
Due May 1st.
The deadline for entries to the Del Mar fair is May 4th. Each entry cost $3. Let me know what pieces you want to enter, pay with check or cash (preferred). The sooner you let me know the better, because we need to mat and label each piece. Each student who enters gets a free admission to the fair. |
| ||
2018 CSE Program Project
|
Due Friday, April 27 at end of class
Challenge: To Design the nicest, most impressive showcase program to date. Analyze the past years' programs and think about what other kind of information you would like to see included. Think about how your program will fold, how big it is. Most importantly, what imagery are you going to include to build a meaning that resembles the messages in the book. Deliverables: 1. Outline of all the sections of types of information and. rationale 2. 3 Sketches of a cover 3. The final brochure in InDesign. |
| ||||||||||
|
|
Magazine Project
|
Due, Friday, March 9 at the end of the period.
This Project will have three parts: a cover page, an article, and an advertisement, and you will compile the designs in InDesign, although the parts can be composed in Photoshop and/or Illustrator. To start, you must first decide what kind of magazine you would like to have. What will it be about? Who will read it? How will you design your magazine to attract that demographic? This can help you decide how to design all three pieces so they look like they would belong in the same publication. Come up with a theme and title for your magazine. Submit in writing a one-paragraph description of your theme for your magazine, answering these questions listed above. 1. Cover page Using Adobe In Design, photoshop and illustrator, Create a cover for your magazine. This must be an original cover. Do not use an existing magazine. Complete with the following requirements:
2. Article Your article will be created in Adobe In Design or MS Publisher, using the layout tools we have discussed in class (guides, frames, and text threads). Your article must be relevant to the kind of magazine you have designed and will include the following:
3.Advertisement You may use either Photoshop or In Design to create your advertisement. It must be for a product that would be in keeping with the theme of your magazine. Please include the following requirements:
|
|
T-Shirt Opportunity
|
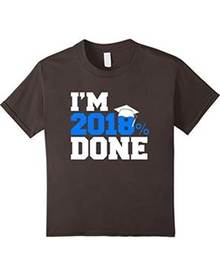
There is an opportunity for one of our students to create and submit a t-shirt design for this year’s “College Signing Day” activities.
If selected, it will be used on this year’s t-shirt and used across the district for all of the seniors who will be going off to college. |
|
Intro To InDesign
|
Tuesday, February 20.
Download the pdf to the right and follow along in class as we begin working inAdobe InDesign |
| ||
Design Challenge: Music Posters
|
Due on Friday, February 9 at end of class
Design Specs: Create an 11 x 17 inch music poster. Set the resolution to 300 and make it an RGB image (if it is not already) Can be created in a combination of Indesign, Photoshop and illustrtor Challenge 1: Music poster using imagery of the artist or band (80 pts) Challenge 2: Music poster using any kink of imagery EXCEPT without any likeness of the artist or band members. (80 pts) Challenge 3: create a poster that is ONLY typographic. (80 pts) All posters must have:
Reflection on your experience of the process. Explain successes and difficulties of each poster. Reflection deadline = Wednesday, February 14 Grading Criteria 1. Use of Balance 2. Use of Contrast 3. Use of Color theory |
Challenge One - Artist Poster examples
Challenge Two - Imagery Poster Examples
Challenge Three - Typography Poster Examples
|
End of Semester
Teen Court Logo
|
Thumbnails and rough sketches due Monday, final logo due Sunday December 8 at 11:59 pm.
This is an Internship and Community Service credit opportunity. The District is starting a new program and the Pilot is occurring on our campus. It is what it sounds like. They take real juvenile court cases and mock try them in a mock court at the district conference center. Students build and argue a prosecution case as well as the defense case. It is then judged based on the arguments presented, by counsel members and district personnel. Our job is to take this concept and build an identifying logo to market the course with. The best 6 designs will be presented to the program administrators who will decide the final logo. The document to the right explains the program in more detail. |
| ||
Letterform Abstraction – Design Exercise
Due Friday at the end of class
1. Working within an 8-x-8-inch square, create compositions
using a single leterform. Examine the forms and
counter-forms of the specific letter that you choose.
2. Isolate just enough of each letter to hint at its identity.
Strike a balance between positive and negative space.
3. Create sixteen squares with one letter in each square.
Composition is top of mind.
NOTE: You can use color, but choose a color scheme.
Have a concept to your letters.
Think about texture use as well
MAKE A DIGITAL SELF-PORTRAIT FROM PHOTOS OF YOUR RUBBISH.
|
Due Monday, November 13
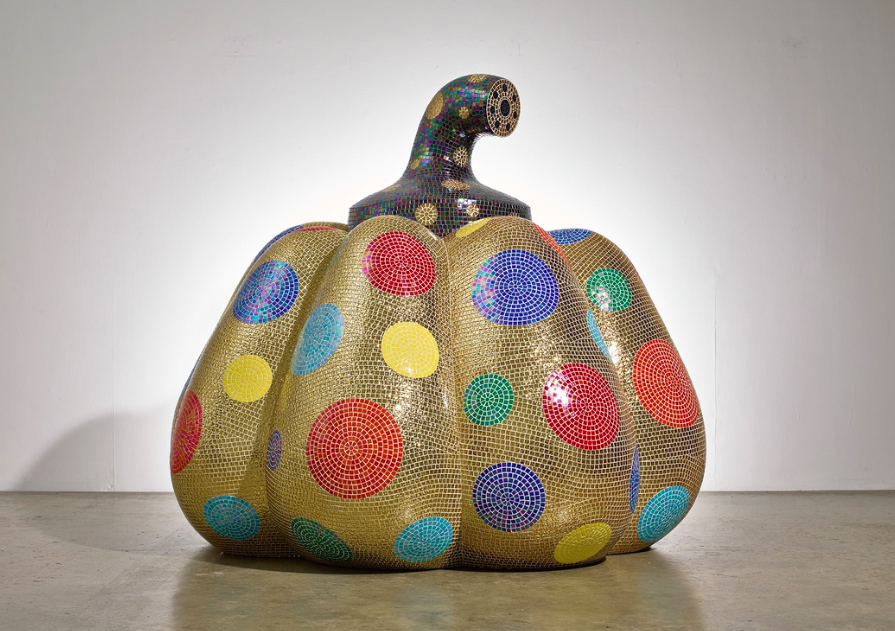
Artists have used the techniques of mosaic (piecing together bits of glass or tile) and collage to create designs and portraits for centuries. The artist, Jenny Odell made a self-portrait composed of all the items she threw away over a two-week period. In this lesson you will make a self-portrait comprised of found and photographed textures. INSPIRATION Jenny Odell demonstrates how to make a digital collage to create a Garbage Selfie. Play video to the right STEPS Collect a few dozen photographs (or download images) of items that you or others discard. Look for a range of textures, colors and values. Have a friend photograph your head and shoulders in front of a plain background. It should be easy to see you against it so you can isolate your figure from the background later. You can pose in profile, three-quarters or straight on. Open your portrait in photoshop and begin to assemble the photos of textured, discarded items you had previously collected to cover your self-portrait. Use only bits of the photos as if you had torn them into pieces. Try to match the value and color of your self-portrait, as you layer the textured photos over it. You may have to crop them, select a portion or change the scale to fit in the contours of your image. Remember, you are trying to match the “you” beneath it all. Be sure to have a folder for this project. You will have a lot of source files with which to work, so you need to stay organized. FILE > SAVE the .psd file. Flatten layers and FILE > SAVE AS a JPEG or PNG, and share it to [email protected] SHARE & REFLECT 1. What were some of the items you gathered or photographed? 2. Did anything surprise you about the discarded objects you found? Why or why not? 3. How did you alter the photographed items to fit into your portrait? 4. Create an interesting title for someone else’s portrait based on the textures found in their piece. |
3_Garbage Selfies from steve exum on Vimeo. |
Study: Texture
|
Due Thursday, November 9th
For each item on the list, snap a photo Find a bumpy texture Find a smooth texture Find a rough texture Find a soft texture Find a shiny texture |
|
Study: Space
|
Due Sunday, Oct 29, at 11:59 pm
Find a way to depict space. Photograph images focusing on space. Choose one for each of the characteristics listed below to depict.. • Dense • Overlapping • Open • Shallow • Negative |
| ||
Surreal Advertisement
|
Due Friday, Nov 10tg, at end of period
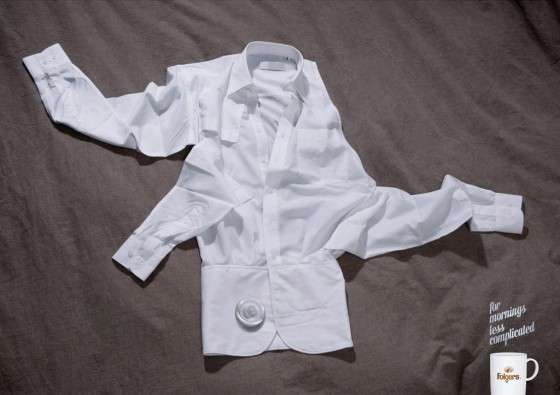
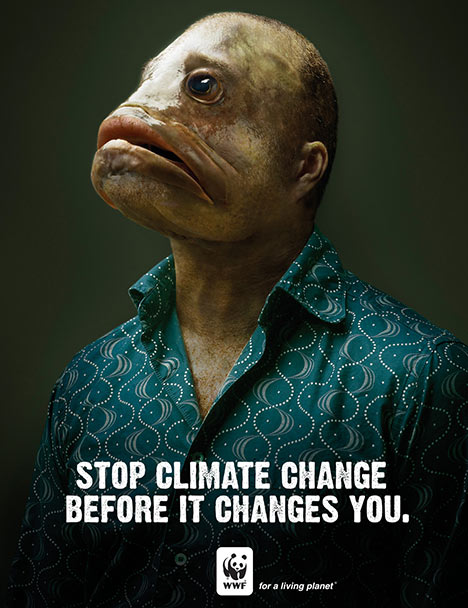
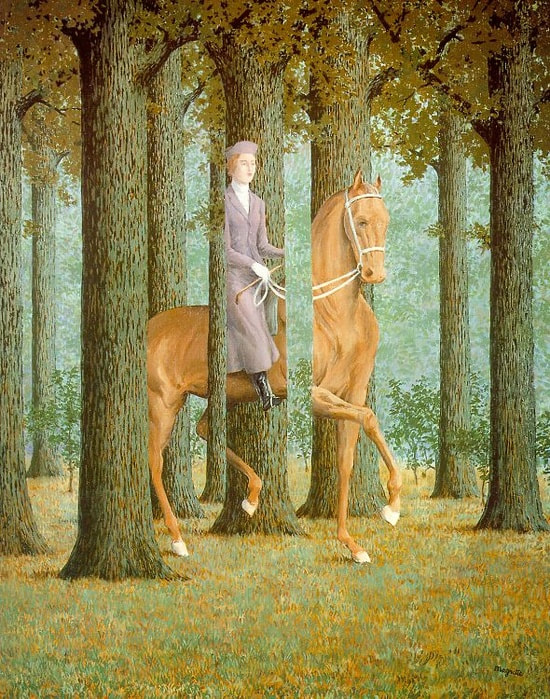
STEPS 1 Research Pick a product that you want to work with, somethng tangible rather than a service would be best. Do your research about the product to determine the following: Describe the Target Audience. 1. Who is most likely to purchase that particular product. Describe age range, economic status, ethnic makeup, gender, eduction level etc. 3. What are the main benefits of the product to the target audience. Give at least 3 4. How does the audience find/purchase the product. 2 To create dream-like imagery, use one or more of the compositional tools of the surrealists. See the attached powerpoint for all of the surrealistic devices. 3. Deliverables: 1. 3 Sketches of different ideas for your ad. Take a picture and share them. Must be in your sketchbook. You can create your ad from photography that you shoot, illustrations that you create, and/or with found artworks. 2. Final Ad composition executed in Illustrator and Photoshop. Must include 1. a Focal Point in your composition 2. Headline that perks the interest of the reader and is aimed at reaching your target audience, as well as a call to action (what do you want the audience to do) and contact info. 3. at least one of the surrealistic devices. SHARE & REFLECT 1 Describe the Ad you created. What makes your Ad surreal or dreamlike? 2 How did you create the illusion of depth in your Ad? 3 Explain the meaning of your illustration and how it helps sell the product. 4 Share your finished landscape to [email protected] |
| ||

Study: Form and You!Due Friday, October 13 at end of class
In this activity, you will select (shoot) a photo of you in a public place and in a specific pose. Experiment with several. Make it so it appears as though you are interacting with the illustrated form that you add into the photo. You will create 3D cubes and/or rectangles to create the illusion of 3D form in your photo. See examples to the right. STEPS Select your background image. Make sure there is enough open space in the picture for the integration of your geometric forms. Think about the surrounding area. How can you incorporate form in an interesting, integrated way? Decide whether elongated rectangles, circles, triangles or cubes will work better in your composition. Consider what size shapes you will use. How many will you use and where will you place them? Remember to create a focal point in your composition. Create your composition in your sketchbook first. Work out the angles you want to include Do all your preliminary planning in your sketchbook. Show me by turning it in Then execute the picture in either photoshop or illustrator. SHARE & REFLECT Have a “gallery walk” and look at your classmates’ collages. What do you notice about each one? How are they similar and how are they different? |
INSPIRATION
Artist Aakash Nihalani creates tromp l’eoil artworks in public space using brightly colored tape and other materials. |
Study: Shape_Mind Map
|
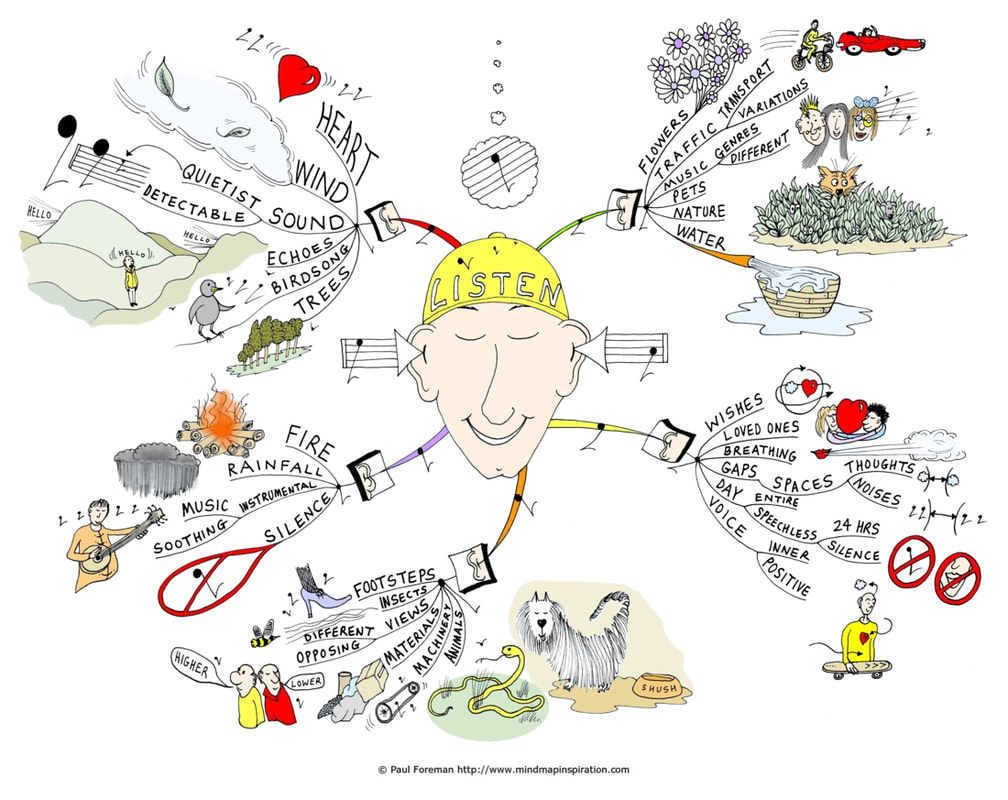
Due, Friday, October 6.
Make a mind map. Create a concept map that describes your routine at a selected time of day, exploring both shape and symbols for your experiences. Think about your favorite time of day (early morning, twilight, dusk, noon, or lunch!) Brainstorm and sketch shapes associated with that time (moon, coffee mug, etc.) Consider artwork by Chris Johanson and Wendy Macnaughton and watch the videos about the work. Are their shapes organic or geometric? STEPS What time of day did you choose as your favorite? What symbol will you use to represent this time? It can be literal (sun = morning, moon = night, etc.) but try expanding your associations with your chosen time to come up with more creative, personal symbols (morning = coffee cup, night = pillow). Remember, these are your symbols, and they only have to make sense to you. If you desire, you can include a code in your map to make the symbology more mysterious. Place the symbol for your time of day in the center of the paper, allowing for room to branch off in all directions. These will be the branches of your main idea. Think of your daily routines associated with this time of day. Your concept map or “mind map” will document the specific symbols that you associate with this time. Let your mind flow, like a stream of consciousness, as you start drawing branches that lead to illustrated symbols of these routines (riding a bike to school or work, breakfast, a special tree you sit under, etc.) You may vary your line weight, shape and color to emphasize the relationships between and intensity associated with these aspects of your day. You can also use line weight to emphasize importance. Use color to suggest mood. SHARE & REFLECT What symbols did you use to map out your time of day? How did you decide to connect them? Did anything surprise you? Was there another student who chose your time of day? If so, what kinds of symbolic shapes did s/he use and how do they compare or differ from yours? Upload your concept map to your Google account. Print your mind map and paste it into your sketchbook. Take a picture and share that to [email protected] |
|
Study: Line_Contour
|
Due September 8 at the end of the period.
Artists use different line types to convey the weight, sizes and shapes of objects in space. In this activity, you will create a series of line drawings by tracing the photographic countours of a 3D object and arrange them in space in a satisfying and dynamic composition. You will use layers, drawing tools and colors to create a unique image. INSPIRATION demo.woop.ie/media/kqed_art/399/feature_3840.html Play Video Fron Link above) In this video, painter David Huffman explains how to choose a personal object as inspiration to create an abstraction. STEPS Photograph an object of personal importance or significance (a possession that is symbolic of hopes, dreams, memories, or identity) from different perspectives (points of view). Open images in Photoshop. On layers, use the brush tools to draw different line weights or line styles by tracing the contours (inner and outer lines) of the photographed objects. Make photographic layers invisible (or delete them), move drawing layers around, arranging and scaling them to create a dynamic, balanced final composition. Add a simple background color or image. Save as a JPEG or PNG. Title your piece by using adjectives (descriptive words) assigned to the characteristics of the lines you used. APPS, SOFTWARE & TOOLS PhotoShop Illustrator SHARE & REFLECT Create a google doc and answer these questions 1 Describe the space you created. What makes your collage surreal or dreamlike? 2 How did you create the illusion of depth in your piece? 3 Select a classmate’s collage and create a story based on its content. 4 Take a picture of that and share it to [email protected]. |
|
Study: Line Homework
Due August 26
1. Find different types of lines. For each item on the list, snap a photo. Try to find them in a pattern, in nature, in the room you are in. Study your surroundings and identify the following lines. Remember, everything we do, is a design
project. Make the best composition you can with your photo.
2. Upload them to your google drive into a folder for this assignment.
3. Place them all on a document, print it and paste into your sketchbook. Take a picture of that and share it to [email protected].
Find a thin line
Find a zigzag line
Find perpendicular lines
Find wavy lines
Find jagged line
Color Worksheet
|
Due Wednesday, August 16th @ end of period
|
| ||
Value Worksheet
|
Due Wednesday, August 16th @ end of period
|
| ||
Texture Worksheet
|
Due Wednesday, August 8th @ end of period
|
| ||
Space Worksheet
|
Due Wednesday, August 8th @ end of period
|
| ||
Form Worksheets
|
Due Friday, August 4th @ end of period
|
| ||
Shape Worksheets
|
Due Friday, August 4th @ end of period
|
| ||||||
Line Worksheets
|
Due Sunday July 30 @ 11:59 pm
Please finish your 2 Line worksheets |
| ||||
MaterialsDue July 31st, 2017
|
| ||
Superhero Sketch
Continue to develop the idea for your superhero. Add to the list of words to support your chosen word. Remember, that is the theme of your hero, not its definition. Make a developed drawing of your hero, then take a picture, upload it to your google account, and share it to [email protected]. Write your explanation in the body of your email. 2 sentences DESCRIBING your hero and his power and what he is all about.
2017/18 Submit Forms
|
Expectation Contract
Internet Use Contract Graphic Design Syllabus Due August 1st, 2016 Download it from the docs to the right, print it out, and have both you and your parents sign it, then turn it in on or before August 1st, 2016 |
| ||||
Google Account/Inspirational Quote
Due July 28th, 2017
Send me an unbelievably inspirational quote from your google account, and include an explanation as to why it is important to you.
Be sure it is an account with your name in it. I wont know who [email protected] is.
This must be a gmail account, not yahoo, hotmail or anything else, just gmail.
Send me an unbelievably inspirational quote from your google account, and include an explanation as to why it is important to you.
Be sure it is an account with your name in it. I wont know who [email protected] is.
This must be a gmail account, not yahoo, hotmail or anything else, just gmail.
Cafeteria Menu Research
Due Thursday at the end of class
1. Research 3 different cafeteria style menus. Restaurant menus won't work here.
2. Identify which elements and principles are at work and explain
3. Identify the focal point.
4. Explain why you think each one was or was not successful.
4. Share your examples and findings with [email protected]
1. Research 3 different cafeteria style menus. Restaurant menus won't work here.
2. Identify which elements and principles are at work and explain
3. Identify the focal point.
4. Explain why you think each one was or was not successful.
4. Share your examples and findings with [email protected]
Rhythm Homework
|
Due by Thursday, January 26
Download the worksheet to the right. Visual rhythm is the repetition of lines, shapes and forms. The viewer might be able to imagine what a work of art would sound like. Repeating a row of identical shapes is one way to show regular one-beat rhythm. Alternating rhythm could be shown by repeating two shapes of different sizes. Progressive rhythm could be shown by lining up a series of squares that gradually go from smallest to largest. A design that gracefully flows without any sudden changes has a flowing rhythm. Jazzy rhythm is shown by abrupt, sudden, and frequent changing repeats. Choose one of the rhythmic styles from above. Draw a landscape, cityscape, or seascape that shows that rhythm. |
| ||
Balance Homework
|
Due by 11:59pm, Monday, January16
Download the worksheets to the right. #1 - Make a pattern using Balance. 3 different compositions. Use your knowledge of the elements of art to build a composition showing the 3 types of balance. #2 - Find 2 examples of each type of balance and describe why or how your example pictures displays the use of balance. |
| ||||
Contrast Homework
|
Due by 11:59pm, Monday, January16
Download the worksheet to the right. Make a pattern using contrast. 4 different compositions. |
| ||
SEMESTER BREAK
All Panel Art is due by the final.
Element 7 _ Color Panels
Make 2 panels in illustrator that are bigger than 5x7". This will be the page size for your Elements of Art Brochure that we will be making later. You should do a lot of your preliminary work in your sketchbook. For each design, you should be able to show at least 4 sketches. Turn them in with your final panel.
Make 2 Panels, each one being a different color category. Analogous, Complimentary, Monochromatic or primary
Make 2 Panels, each one being a different color category. Analogous, Complimentary, Monochromatic or primary
Element 6 _ Value Panels
Make 2 panels in illustrator that are bigger than 5x7". This will be the page size for your Elements of Art Brochure that we will be making later. You should do a lot of your preliminary work in your sketchbook. For each design, you should be able to show at least 4 sketches. Turn them in with your final panel.
Make 2 panels. One using a monochromatic value scale, and the other using a Value Contrast scale
Make 2 panels. One using a monochromatic value scale, and the other using a Value Contrast scale
Element 5 _ Texture Panels
Make 2 panels in illustrator that are bigger than 5x7". This will be the page size for your Elements of Art Brochure that we will be making later. You should do a lot of your preliminary work in your sketchbook. For each design, you should be able to show at least 4 sketches. Turn them in with your final panel.
Make one panel a man-made or machined texture, and the other an organic or natural texture.
Make one panel a man-made or machined texture, and the other an organic or natural texture.
Element 4 _ Space Panels
Due Friday, October 21 at end of class.
Make a panel in illustrator that is bigger than 5x7". This will be the page size for your Elements of Art Brochure that we will be making later. You should do a lot of your preliminary work in your sketchbook. For each design, you should be able to show at least 4 sketches. Turn them in with your final panel
Make 2 Illustration Panels demonstrating your mastery of Illustrator and the element of FORM.
One is to be Geometric, and one is to be Organic or Abstract, as explained in the Presentation.
Element 3 _ Form Panels
Due Friday, October 21 at end of class.
Make a panel in illustrator that is bigger than 5x7". This will be the page size for your Elements of Art Brochure that we will be making later. You should do a lot of your preliminary work in your sketchbook. For each design, you should be able to show at least 4 sketches. Turn them in with your final panel
Make 2 Illustration Panels demonstrating your mastery of Illustrator and the element of FORM.
One is to be Geometric, and one is to be Organic or Abstract, as explained in the Presentation.
Make a panel in illustrator that is bigger than 5x7". This will be the page size for your Elements of Art Brochure that we will be making later. You should do a lot of your preliminary work in your sketchbook. For each design, you should be able to show at least 4 sketches. Turn them in with your final panel
Make 2 Illustration Panels demonstrating your mastery of Illustrator and the element of FORM.
One is to be Geometric, and one is to be Organic or Abstract, as explained in the Presentation.
CopyrightDue Friday, September 16 @ end of class
Download the document "Copyright Basics" located to the right. Read these 3 sections: What Is Copyright? Who Can Claim Copyright? What Works Are Protected? |
| ||
Benedict.com provides a lot of useful information regarding copyright, patent and trademark rules and regulations. This page also offers stories of documented copyright infringement disputes. The stories are divided into three (3) main categories: movies, music and web.
ASSIGNMENT:
ASSIGNMENT:
- Go to http://www.benedict.com.
- Move your mouse to the web section, and choose "Process More". Explore the disputes in the WEB section and choose two (2) cases to write about from the left hand column of the website (Batman, Devil's Advocate, 12 Monkeys etc..
- Open Google Docs
- Title your document “Copyright Cases” and IN YOUR OWN WORDS, give a brief account (Summary) of the two (2) cases you have chosen. 3 paragraphs for each case as a minimum.
- Include in your Summary: The parties involved, what they are arguing about and who won the case. If the case is still in court, state that the outcome is pending.
- Download at least two (2) images per story from the Internet to illustrate your stories.
- If you search for “Free Use” or “Royalty Free” images, many sites will come up. It is OK if the images you choose have watermarks.
- You may use Photoshop to edit each of your images but it is not required.
- Insert the pictures into your stories. (In Word: Insert > Photo > Picture From File).
- You may resize the photos once you insert them into Microsoft Word.
- When finished, Save and share your document. Please include your name and period number at the top of the document
Element 2 _ Shape Art Panel
|
Due September 2nd at 11:59pm
Make a panel in illustrator that is bigger than 5x7". This will be the page size for your Elements of Art Brochure that we will be making later. You should do a lot of your preliminary work in your sketchbook. For each design, you should be able to show at least 4 sketches. Make 2 Illustration Panels demonstrating your mastery of Illustrator and the element of SHAPE.One is to be Geometric, and one is to be Organic. |
Element 1 _ Line Art Panel
|
Due August 12, at the end of class
After studying the element of LINE, and having reviewed some great examples of several compositions, you should have a good understanding of what to do for your panel. Make a panel in illustrator that is bigger than 5x7". This will be the page size for your Elements of Art Brochure that we will be making later. You should do a lot of your preliminary work in your sketchbook. For each design, you should be able to show at least 4 sketches. Make 2 Illustration Panels demonstrating your mastery of Illustrator and the element of LINE. We will critique them next week in class |
| ||
Creative Juice Exercises
Creativity is something that should be trained everyday, or else it would get out of shape.
Thus, doing some creativity exercises would ensure that your brain remains sharp enough for you to do your projects effectively.
Aside from that, it’s inevitable that you will run into a creative block where it would seem that your fountain of creativity has run out. Doing some light doodling will help getting you back in the zone. I’ve listed some mini design exercises you can do to get your creative juices flowing.
ShapeUps
|
Due at Beginning of class, August 1st, 2016
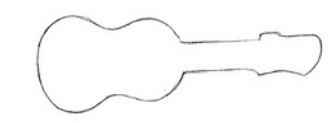
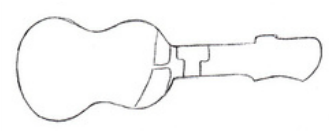
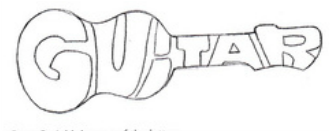
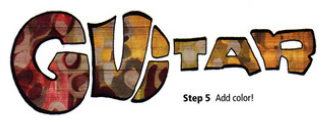
Many graphics and logos contain letters that are drawn to form the shape of an object or an idea. There is freedom to drawing these types of words because there are no rules - the letters can simply morph into whatever you want them to be. Follow the steps below to try your hand at drawing an object-shaped word. Step 1 Draw a faint simple outline of your object. Step 2 Draw the middle letters of the word in the center of the outlined shape to establish the spacing of the letters. Step 3 Add the remaining letters. Step 4 Erase your outlined shape and refine your letter shapes Step 5 Add Color. Turning it in 1. Take a picture of your finished work and of all your sketches. 2. Upload them to your Google drive in a folder for Multimedia, and inside that a folder for Shape ups. 3. Share it to [email protected] |

|
The Many Faces of Your Imagination
|
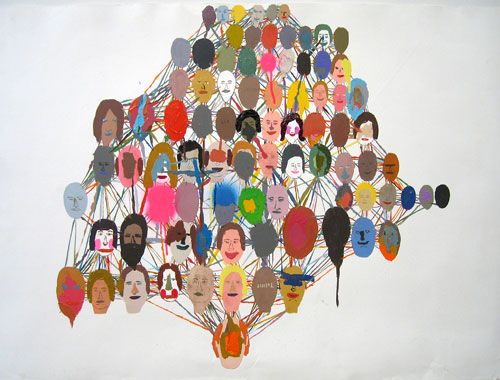
Due at Beginning of class, August 1st, 2016
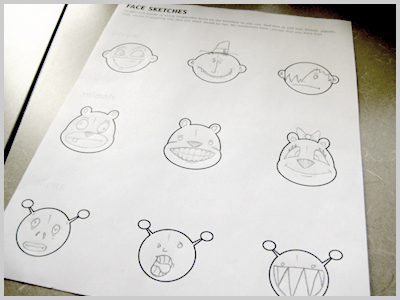
This exercise is pure fun. All you have to do grab a pencil, download the face template and begin drawing! 1. The template has nine areas for you to draw different types of faces. Try to be as descriptive as you can in your drawing. We want to see the emotion of the character. Anger, Fierceness, Timidity etc. Make a different emotion for each of the nine examples. Make it detailed. 2. Spend some time developing the personality of each of the characters. 3. You can add color to your drawings with a class set of colored pencils. The sub can get them for you if you ask. 4. Sketching is always a great way to sharpen your creative skills. Who knows, maybe one of the faces you draw will be a starting point for a great, 3D animated character in the future. |
| ||
Monster Doodles
|
Due at Beginning of class, August 1st, 2016
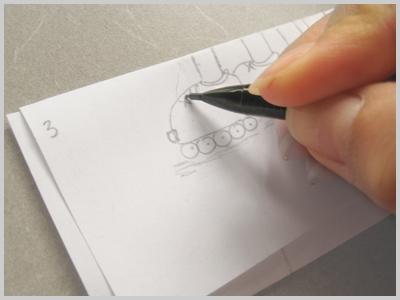
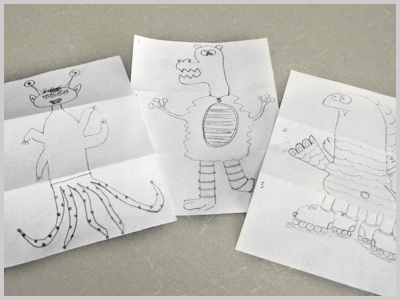
This mini-exercise requires the company of at least two other friends. Together, the three of you will be collaborating to create a monster. The trick is that you won’t see what each of you will draw until the very end. First, fold three pieces of paper into three linear sections. See picture #2 at right to see how to fold it. On each folded section write a number 1 for top, 2 for middle and 3 for bottom. Each person gets a piece of paper and starts to doodle a monster head on the top section 1. Get creative! It can have 20 eyes, three mouths, a Mario Bros hat on, whatever you want to draw is perfectly fine, as long as it is school appropriate. After each person is done, pass the paper to another person in your group. Now everyone begins to draw a monster mid-section on the #2 panel of your piece of paper. Once again, pass the paper around and then have everyone draw the legs and feet (or slime blob if your creature has no legs or feet) on section #3. After everyone is done drawing, open up your papers and see the finished monster creation that you have drawn together with friends. |
|
Tear It Up
|
Due August 1st, 2016
Create a poster for a concert, going on in your town. 1. Sketch out in your book the layout and design for your poster. Include a main focal point picture. Ex - the lead singer, the drummer or if it is a benefit concert, maybe for animal rights say, use an animal. Be creative. Think about who the audience is and what would make them want to buy tickets. Include a main headline, the dates, the name of the concert, a location and the cost of the tickets. 2. Now, Instead of executing your actual poster design with a pencil, make the poster completely out of torn things; pieces of paper, solid objects, magazines, found elements and make it a collage of found objects. 3. Plan for it. You will need to collect all of your torn or found elements at home and bring them to class. |
|
Here is where I draw the line
Due August 1st, 2016
Lets get rid of the “I can’t draw” mentality.
Take out some sketch paper.
Now, find an object in the room you are in, and bring it in to class to draw tomorrow.
You are going to draw this object, but with a catch. You can’t look at the paper.
Look solely at the object. Don’t give in to the urge to look at the paper and see how you are doing.
Just draw. Have some fun with this.
Google Account/Inspirational Quote
Due, @ 11:59pm Sunday, July 24th, 2016
Send me an unbelievably inspirational quote from your google account. Be sure it is an account with your name in it. I wont know who [email protected] is.
This must be a gmail account, not yahoo, hotmail or anything else, just gmail.
Send me an unbelievably inspirational quote from your google account. Be sure it is an account with your name in it. I wont know who [email protected] is.
This must be a gmail account, not yahoo, hotmail or anything else, just gmail.
Materials you will need for class |
| ||
Due July 31st, 2017
